1) Minimum Hardware Requirements
When you’re ready, insert the DVD and (re)start the computer. Live CD/USB installation is described below
The first thing you’ll see is this welcome screen.

STEP2–>Select desired language for installation and a few other options, afterwards begin installation

STEP3–>Select Language, Keyboard Layout, and accept license by clicking next
as you accept license agreement The installer analyzes your hardware and builds the software repository cache.
STEP4–> Select your Installation Mode i.e. New Installation or Update
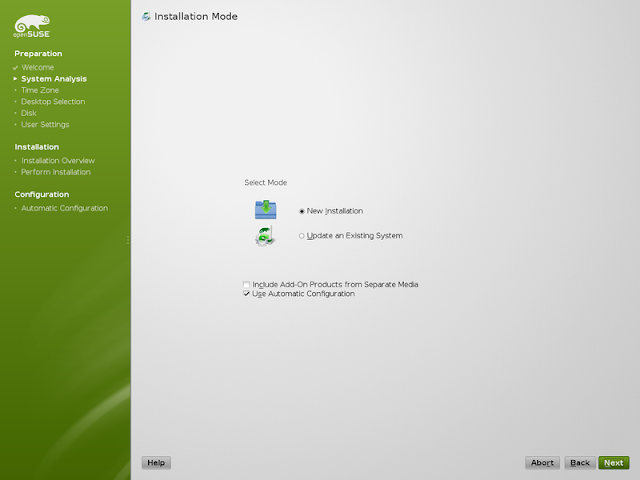
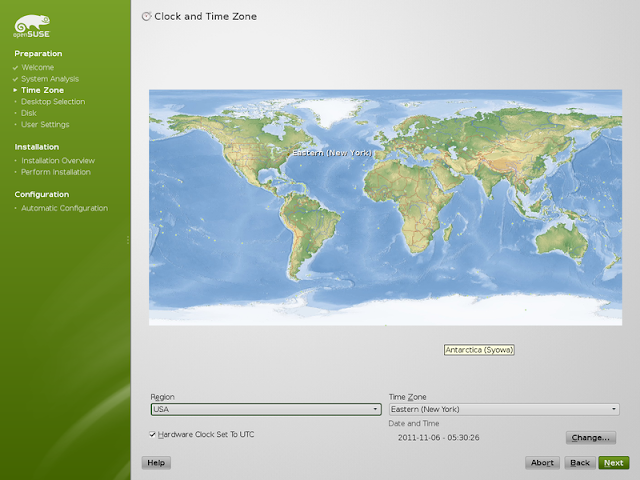
STEP5–>Set the time zone and click next to continue.
If you have only GNU/Linux it’s recommended to set the hardware clock to UTC, if you dual boot with MS Windows set it to local time.
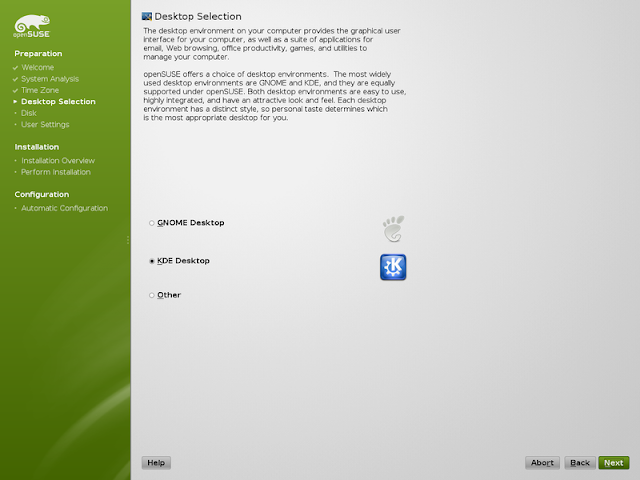
STEP6–> Select Desktop Environment that you want to install and click next.
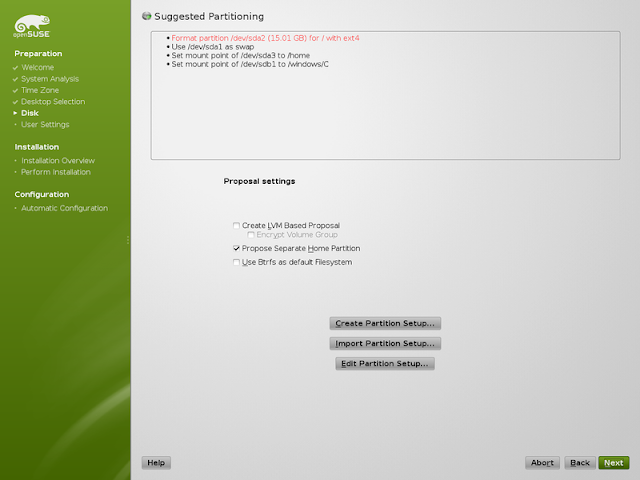
STEP7–>By default openSUSE will propose to create three new partitions / (root) for system files, /home/ for personal files of users and swap which is used as a supplement for RAM, similar to the page file in MS Windows.
If you’re performing a dual boot installation, be extra careful here.
Note that Linux labels disks/partitions using the following scheme – sda1 is first partition on the first disk, sdb3 is the third partition on the second disk, and so forth. Partitions that will be formatted are written in red text. click next to continue.
STEP8–>Select edit partition setup if you want to partition hard disk manually.

STEP 8A–> here you can see how mount point and file system can be chosen(select partition –click edit–choose file system –mount point–finish)

click on save and you will be redirected to disk partition screen just click on next and you will be directed to create user screen.
STEP9–>enter User Full name,name and password for user.(Note that this will be your normal account and by default the root user (administrator) password will be the same as the password for the normal user.)
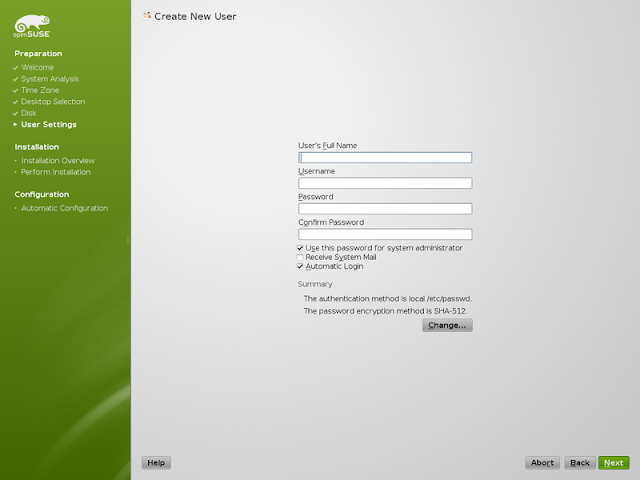
STEP10–>next step is to select boot loader,packages here you can make changes which you have made earlier.e.g partitioning.Double check that everything is as desired.
as you click to install yast manager will ask confirmation from you.
when you are sure then press install to start installation.
STEP11–>After installation is performed, the system will restart and perform auto configuration.
And finally your brand new open SUSE system will start. Congratulations, and have a lot of fun with open SUSE!
- CPU: Pentium III 500 MHz or higher processor (Pentium 4 2.4 GHz or higher or any AMD64 or Intel64 processor recommended)
- RAM: 1 GB physical RAM (2 GB recommended)
- Disk Space: 5.0 GB for a normal installation (more recommended)
- Sound and Graphics Card: Most modern cards are supported
When you’re ready, insert the DVD and (re)start the computer. Live CD/USB installation is described below
The first thing you’ll see is this welcome screen.

STEP2–>Select desired language for installation and a few other options, afterwards begin installation

STEP3–>Select Language, Keyboard Layout, and accept license by clicking next
as you accept license agreement The installer analyzes your hardware and builds the software repository cache.
STEP4–> Select your Installation Mode i.e. New Installation or Update

STEP5–>Set the time zone and click next to continue.
If you have only GNU/Linux it’s recommended to set the hardware clock to UTC, if you dual boot with MS Windows set it to local time.

STEP6–> Select Desktop Environment that you want to install and click next.

STEP7–>By default openSUSE will propose to create three new partitions / (root) for system files, /home/ for personal files of users and swap which is used as a supplement for RAM, similar to the page file in MS Windows.
If you’re performing a dual boot installation, be extra careful here.
Note that Linux labels disks/partitions using the following scheme – sda1 is first partition on the first disk, sdb3 is the third partition on the second disk, and so forth. Partitions that will be formatted are written in red text. click next to continue.

STEP8–>Select edit partition setup if you want to partition hard disk manually.

STEP 8A–> here you can see how mount point and file system can be chosen(select partition –click edit–choose file system –mount point–finish)

click on save and you will be redirected to disk partition screen just click on next and you will be directed to create user screen.
STEP9–>enter User Full name,name and password for user.(Note that this will be your normal account and by default the root user (administrator) password will be the same as the password for the normal user.)

STEP10–>next step is to select boot loader,packages here you can make changes which you have made earlier.e.g partitioning.Double check that everything is as desired.
as you click to install yast manager will ask confirmation from you.
when you are sure then press install to start installation.
STEP11–>After installation is performed, the system will restart and perform auto configuration.
And finally your brand new open SUSE system will start. Congratulations, and have a lot of fun with open SUSE!


No comments:
Post a Comment